Showing posts with label miniatures. Show all posts

Monday, September 12, 2011

Miniature gaming

Chuck Hammack, newly moved to West Richland, invited War Eagles over to christen his new game room. He gave us an American Civil War scenario with Regimental Fire and Fury as the rules. It's a beautiful table, with lots of eye candy, 15mm scale figures. Photos, as always are posted at full resolution, click to embiggen if you want a closer look.


The terrain represents a gap which the Union must take and clear of Confederate troops. A few Rebels are visible as the Union brigades deploy, but after completing their deployment, the remaining four regiments of the Rebel brigade appear on the far right of the Union forces.

The left brigade, four regiments of infantry under my command advanced without consideration of the sudden appearance. Shooting commenced.


The infantry fire on the left was inconclusive, but Union artillery shattered the Rebel arty's infantry supports:


(This is exaggerated, we miscalculated at first. Only three stands of the regiment rather than five of eight were destroyed by a single, well executed round of artillery fire, but still....)

In a move worthy of Phil Sheridan, the Rebel regiments (in open order!) charged the advancing Union lines. Successfully. The entire Union brigade was thrown back in some disarray.


While the Union brigade hauled itself back into order, the Rebels, playing only for time, fell back to their original positions. Meanwhile, the Union center brigade deployed to the right to face the ambush. The Rebels advanced into the woods, then fell back before the boys in blue, never intending to get into a fight there. The Union general (John Hayes) filtered the artillery's infantry support through the woods and pursued through the open fields with the center brigade. The artillery deployed forward after decimating the Confederate regiment manning the fence.

The rebels and the bluebellies had a lively time on the ridge line in the center above, while the Union batteries suppressed and destroyed the Confederate guns. That leftmost regiment surrendered some casualties to the rebel enfilade fire before the artillery could get into action, but were still a fighting unit when the Rebs took a stand.

Continuing the pattern of Rebel aggressiveness two regiments on the right charged the Union line with cold steel. In a flurry of die roll 10's, the furious charge was broken and then smashed to oblivion. I suspect that Gary expected (not unreasonably) the leftmost brigade (shown here only by their casualties} to last at least the turn. But, alas, the dice of death had other ideas today and by this time we had the calculations down....


Meanwhile, on the other flank, after a brief Rebel defense of the hillcrest, the Union brigade under my command has finally driven the rightmost regiment into headlong retreat while in another miraculous die roll, the single regiment facing the Confederate sharpshooters (off the picture to the left) has held their gap in the ridgeline....


The Union general has eleven game turns to clear the gap before dark. At the end of turn eight, the table looks like this:


(You may want to click on the photo to enlarge it to full size.) On the Union right, the gallant confederates are outnumbered and overlapped. In the center, the rebel artillery has been destroyed, a last section limping away. The regiment assigned to support it is hiding behind the terrain, spent in the first turn by massed artillery fire. On the left, one regiment is in headlong retreat, the other must either retreat or face Union troops from front and rear. The scattered Confederates can't consolidate and hold out and will inevitably be swept from the field. So I say. Y'all may think differently.... ;o)

Wednesday, March 30, 2011

Gamestorm 2011

Mostly board games this year, and almost exclusively with Carl and Phil... Carl brought his wife, Chris, who was a very good sport all weekend. I forgot my cameras, so the photos are from my camera phone....

Friday, Phil introduced us to a game he's been playing with his daughter and her fiancee, A Touch of Evil. Pretty cards, lots of characters and opportunity for roleplay in a early 1800's horror milieu. It's not about winning and losing, it's how you play the game.....

Saturday started with a zombie game from the same company (Flying Frog Productions), The Last Night On Earth. Rather more literal and colorful game board, with some modular variation, lots of stock characters and plenty of zombies, followed with a trip to Powell's.... I should not be allowed to go to bookstores.

Saturday night was the annual Axis and Allies Anniversary Edition:

The game ended with no bragging rights and an extended recrimination phase..... Chris actually played as the US, built lots of stuff and had launched Operation Torch with substantial forces. But the Italian Navy was going to put a stop to the naval side with a side operation to take out the uncovered air power in Gibralter. The Russian front was a bloody mess with no clear winner but the Japanese had taken China and were ready to move on the Russian's naked backside and the German industrial capacity was still at a high level. The British had strength in India to argue the point with the Japanese, but my money would be on the Germans eventually burying the Russians in an avalanche of tanks and infantry backed by air power. Also, the Japanese had landed a powerful invasion force backed by carriers...in Alaska. This was bound to distract the US player from Operation Torch. See, extended recrimination phase..... ;o)

Sunday was devoted to Hordes of the Things and the drive home. Here's a pic of Phil's new Beastmen, another gorgeous army fielded by him and not done justice by the camera phone.... According to Phil this was one of those nobody-makes-a-mistake balanced-on-a-knife-edge near run things that give great satisfaction to gamers....


Meanwhile, on the next table over, Chris was winning her first Hordes of the Things battle by defeating Phil's Goblins under my command with my Orcs.... It would have been humiliating, but they were Goblins, after all, a flawed tool at best.

Sunday, March 20, 2011

Trafalgar, only more!

So, the latest War Eagles project was a continuation of our New Year's Day battle (chronicled here).

This year's scenario was a hypothetical wherein all available Spanish and French ships in the Mediterranean Sea attempt to break past a scraped up British blocking fleet in the Straits of Gibralter. The British have a large number of frigates and smaller ships, a few third rates and a couple of East India Men which the Spanish mistook for third rates and pounded to pieces....
The break out was to reinforce the Combined Spanish/French Fleet at Trafalgar. In order to create an even tougher problem for the British, Gary researched all available French and Spanish ships and inserted a Northern Reinforcement Division of seven SOL and a Frigate and the French Ghost Fleet, a well commanded, experienced, small but powerful fleet loose in the Atlantic at the time on a commerce raiding mission.

The map below was modified from a map available at Broadside, Home of Nelson's Navy...
a collection of pages describing life in Royal Navy in the late eighteenth and early nineteenth century
The original map and a description of the historical battle is here.

The scenario was designed using a similar map from "Nelson, The Commander" by Geoffrey Bennett, 1972. I believe some liberty's were taken with the order of ships in the original van, which became the rear division when the Combined Fleet reversed direction prior to the battle. I have made some adjustments to the map to allow for the actual location of our ships in our What If scenario, which begins a little later in time than the original map, as the Combined Fleet has had a bit more time to gather itself into a line of battle. By the time the British fleet approached the Combined Fleet, cohesive battle lines had been formed in both the lead and lagging divisions. The Northern Reinforcement, the Mediterranean Breakout and the Ghost Fleet all entered the table in line of battle. A number of frigates were present on both sides. They are shown on the original map, but in our re-fight, the frigates all withdrew before the battle, off table to the East and West respectively, so I removed them from the map below showing our starting positions. More or less. Unfortunately, I forgot my cameras the first day, so there are no photos. In the absence of photography, I spent a lot of time with Paint working on this map.

You can see the Africa, British 64, at the head of the Combined Fleet. Captained by Henry Digby, Africa had become separated from Nelson's column during the night. Liberally interpreting his orders to rejoin Nelson, Digby sailed down the line of battle toward Nelson's Victory at the head of the windward British column, exchanging broadsides with a number of French and Spanish ships. In our refight, he didn't quite make it to Nelson, striking his flag due to hull damage about two turns short....

As the British columns approached the Combined Fleet, all ships within range fired at the rigging of the ships at the head of the columns, Nelson's Victory and Collingwood's Royal Sovereign. Both ships were dismasted about 6 inches short of the line, disrupting the British lines of battle and ultimately preventing them from their goal of penetrating and enveloping the rear division of the Combined Fleet. The first night's action took up the first twelve turns. On our second evening's session, here is how things stood:

In the historical battle, Nelson struck the center of the Combined Fleet's line, penetrated it and initiated a general melee against the rear of the column, with a substantial advantage in numbers and quality. In the meantime, the lead division sailed on for a time and was too late in returning to the rear division which was overwhelmed. With the advantage of hindsight and reinforcements, the Combined Fleet tried a different approach. After Victory had been dismasted, the gigantic Santissima Trinidad, 130 followed by the San Justo, 74 turned to engage, paralleled by Admiral Villeneuve in the Bucentaurre, 80 followed by the Neptune, 74. With the Africa struck and a hazard to navigation immediately to windward of the Santissima, turning into the British line of battle created an unholy traffic jam. The Bucentaurre, hammered by Victory (mastless but still a gun platform) and other British ships, was forced to strike on turn 14. Neptune pulled out to pass to windward. The Santissima Trinidad, engaged by three British ships is being pounded and cannot last long. San Justo and other ships from the van are engaging the British ships pulling past the Santissima. Meanwhile, Victory has been attracting attention even though dismasted. On turn 15, after taking damage every turn, Victory finally is holed at the waterline by (FR) Redoubtable's final broadside before being forced to strike herself. Tonnant, British 84, adjacent to the east of Redoubtable, hammered by the full Northern Reinforcement line a few inches further east and pounded by Redoubtable's partner immediately ahead also struck but only after forcing Redoubtable out of the fight.

The Combined Fleet van turning immediately back into the fight plus the arrival of the Northern Reinforcement's battle line has created a substantial numerical advantage for the Spanish and French ships engaged with Nelson's column. Nelson's column is no longer a column and maneuvering is hampered by the many ships which have struck or sunk in the center and the sheer glut of ships in a small space. The Victory has struck and Nelson is transferring his flag to the Neptune, 98. It's a hard pounding for everybody and more Spanish and French ships are nearing the fight as the Mediterranean breakout and the Ghost fleet sailing upwind are nearing the leeward column.

The general situation at the end of the session:


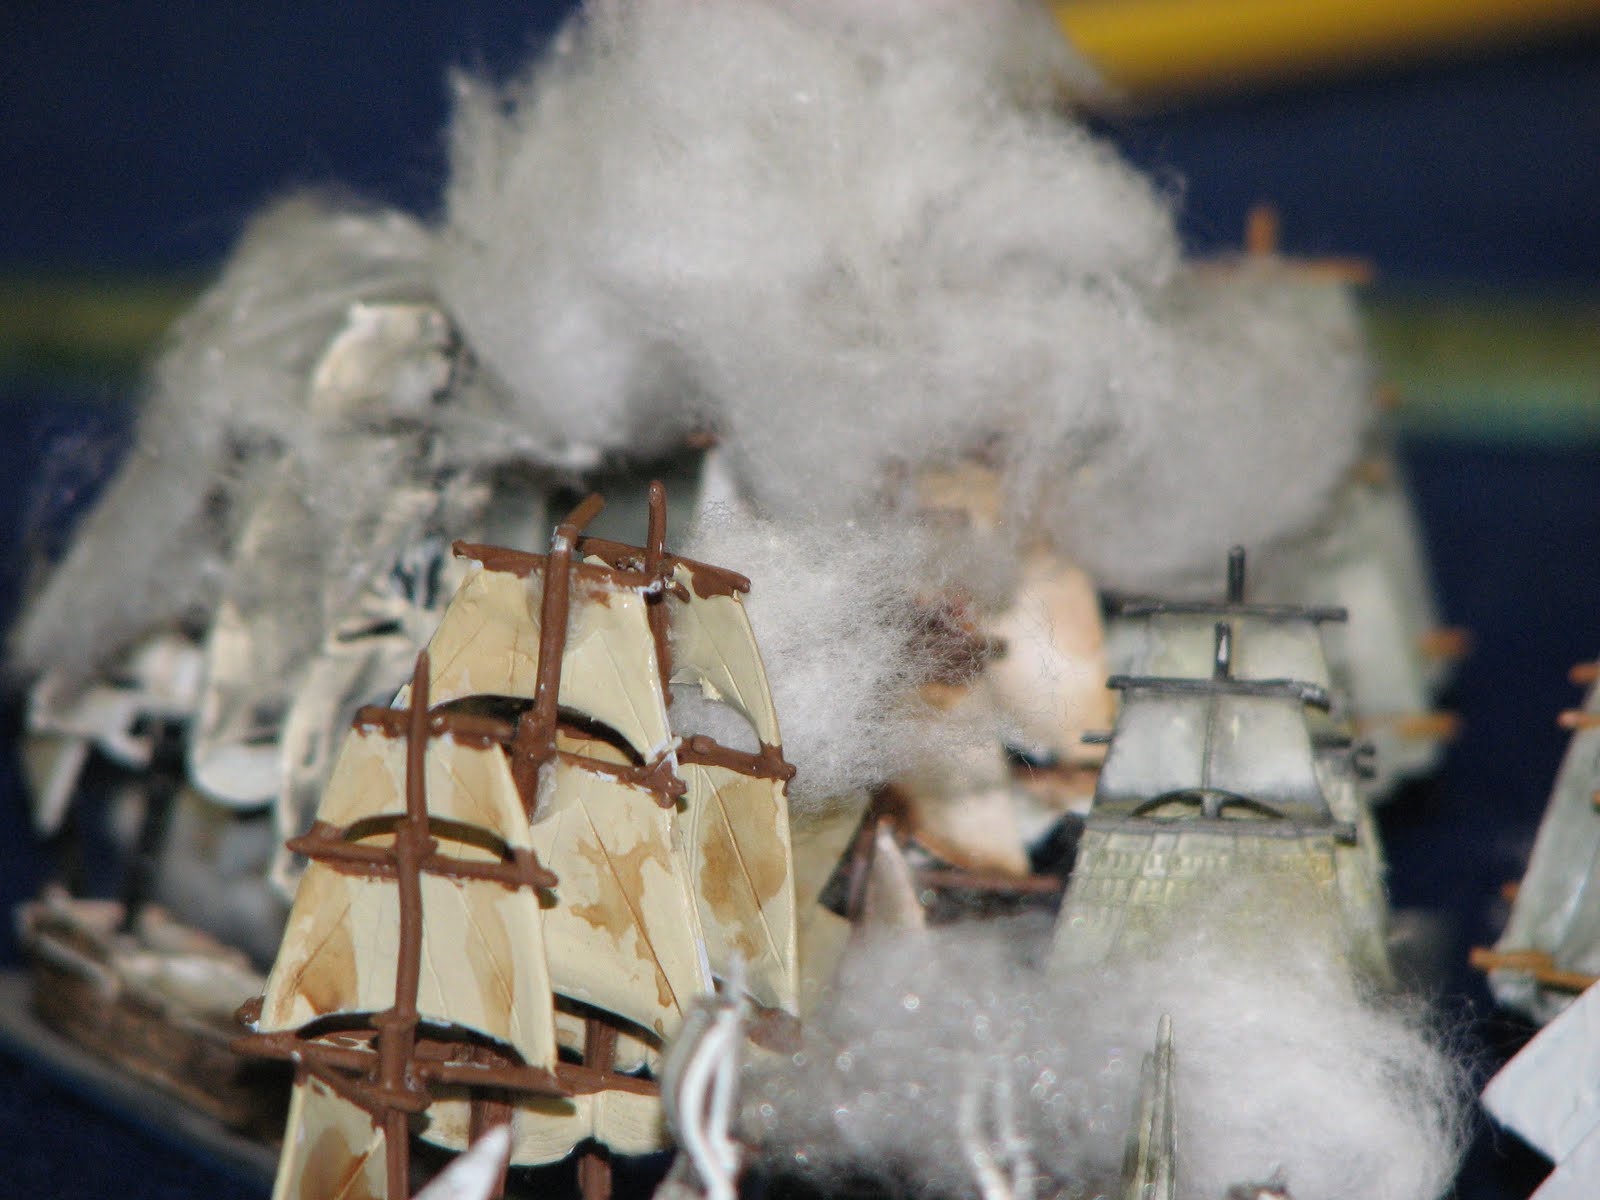
One more session was needed to reach a conclusion. But the last session would start with a huge surprise on turn 17. A picture is worth a thousand words.
Obscured by the huge cloud of smoke, throwing flaming debris and splinters everywhere, the largest ship in the world, flagship of the Spanish Fleet, the Santissima Trinidad just blew up. Good photo op. This doesn't really change the battle, she would have been forced to strike in the next turn and probably would have done very little more damage, but wow, was it unexpected. Bucentaurre (already struck), San Justo, Neptuno and Mont Blanc all took friendly damage from the explosion, but Ajax, Orion and Conqueror adjacent to the explosion, lost masts, took hull hits and lost guns.

On turn 18, Royal Soveriegn finally succumbed to the fire of the line of battle sailing past her and Collingwood transferred his flag to Belleisle. In another surprise, at the tag end of the Van's line, Intrepide, French 74 and Spartiate, British 74 coughed final defiance at each other and both surrendered. Unfortunately, neither were able to successfully fight the fires started and burned to the waterline. Behind the Spartiate, you can see where the Minotaur, hulled numerous times while sailing the length of the Combined Fleet van, has quietly sunk beneath the waves.

The Africa, Minotaur, Spartiate, Mars and Collosus (?) all managed to prove a basic principle: Sailing down a column of ships that outnumber you will spread the damage you give out over multiple ships and they will survive, while you take all the damage from the enemy ships and don't.

On turn 19, the Mediterranean breakout fleet reached engagement range, with the lead three ships all firing on what I think was Thunderer, forcing it to strike in just two turns. On turn 20, with Thunderer struck, Ajax and Conqueror unable to sail into the wind due to masts lost in the explosion of the Santissima Trinidad, the hoped for superiority of the leeward column compromised by the loss of Thunderer, Mars and Colossus, the imminent arrival of the Ghost Fleet and the head and tail of the Combined Fleet's rear division turning on it, the minor success of forcing the Argonaute to strike just didn't seem to be enough to balance the bad news. Nelson signaled for a general withdrawal.
The Lee squadron ships engaging the Mediterranean fleet at the rear of the Combined Fleet can easily sail away to the west. Belleisle and Neptune along with the two ships engaging the Northern Reinforcement, plus Orion (able to sail only down wind, but already headed that way) and Conqueror backing out of the mess can withdraw to the west. Ajax is trapped in the mess and forced to surrender.

The battle has been fought in light winds, but gale winds are expected tonight. The fleets are just a few miles off a lee shore, and ships with compromised handling are liable to be driven onto the rocks and destroyed. A common result of critical hits has been to sever the anchor cables so for many ships, anchoring in shallow water before running aground is not an option.

The final tally:

Spanish losses: The Atlas (74), San Juan de Nepomuceno (74) and San Augustino (74) all forced to strike due to hull damage and without anchors were driven onto the shore by the gale and destroyed. The Neptuno, hulled below the waterline, sank outright. And, of course, the Santissima Trinidad. All other Spanish ships were either salvaged or made port on their own.

French losses: The Intrepide (74) burned to the waterline. The Redoubtable (74) sank during the battle. The Argonaute, sailing ability compromised and anchor cable severed, was driven onto rocks and broken to splinters.

British losses: The Minotaur (74), the Colossus (74), Ajax (74) and Britannia (100) were salvaged and brought to port as prizes by the Combined Fleet. Proper allocation of the prize money remains in dispute, will remain in dispute and owing to the two countries involved, will probably have a recrimination phase lasting for centuries if the legal disputes are ever settled.... Prize crews aboard the Tonnant (80), Mars (74) and Atlas (74) were unable to keep to windward of the Cape of Trafalgar and were taken off. Peasants living near the Cape have building materials for the next 10 years. Leviathan (74), Africa (64), Thunderer (74), Royal Sovereign (110) and the Victory (100) all sank before the gale winds could wreck them.

Nelson lives, but the luster of his name has been blemished, dulled, tarred, perhaps even eclipsed. Time will tell if he can redeem himself or if the Admiralty will even ever employ him again.

UPDATE: You may have noticed in the photos above, some of (especially) the British ships are named in more than one place. I am not at all confident of where specific ships went in our scenario, and especially in the Lee Division commanded by Collingwood. Mars, Colossus and Thunderer are all over the place. If anybody can correctly identify any ships, please let me know and I will redo the photos as needed.

ALSO: I completely neglected to document the singular success of the British Reinforcing Squadron...er, ship. The ship which was observing the port from which a large portion of the Spanish Northern Reinforcement issued was released to Nelson as a reinforcement. Operating alone, **** harassed the tail of the returning Combined Fleet van, forcing two ships to strike, even while backtracking to rescue a politically important midshipman who had fallen overboard.

Saturday, July 17, 2010

Enfilade HOTT Tournament


I should have had this post up a month ago, but various activities and, well, lazy.....

The Enfilade Hordes of the Things Tournament 2010 had eight entries this year, up from six players in the tournament two years ago. I remembered the camera this year, but didn't take a lot of photos.

Results:

Round one: We laid out the battlefields with some paired armies and threw all the armies in a hat and each player drew an army.

Tom Condon v. George Allen, George was victorious with a general kill and 4 additional army points
Chuck Morris v. Henry Thomson, Jr., Henry was victorious losing only a hero to Chuck's losses of a Knight General, a horde, a paladin and a shooter.
Jeff Condon v. Phil Williams, Jeff was victorious with another general kill, Phil losing 9 additional army points
Buddy Scott v. Joel Hahn, Joel was victorious over noob Buddy Scott, Joel having finished second in the tournament two years ago.

Round Two: Losers chose an army and then the winners drew an opponent.

Jeff Condon v. Tom Condon, yet another general kill for the win, Tom setting a record for hard luck this year, losing this time to his own brother, adding insult to injury.
Phil Williams v. George Allen, in a clash of my oldest friends, Phil abused George by throwing an aerial hero behind his line and engaging the hero general before the battle lines could be joined. George lost, game over. Wow.
Chuck Monson v. Henry Thomson, Jr., and with still another general kill after Henry's god wandered off, this time Chuck with the win.
Buddy Scott v. Joel Hahn, another rematch of the novice vs experienced player, I don't remember the details, but same result.

This consumed our time allotment and the tables were unavailable and the players were committed to other games, so the two undefeated players, Jeff Condon and Joel Hahn made arrangements for a playoff on an open table on Sunday.


Jeff Chose the Goblin army and Joel chose Elves, the Goblin army defending. The experienced players arranged their lines and advanced to the fray, with some maneuvering that ended up with both lines locked in a huge melee. The opposing hero generals ended up opposing each other and the result of a clash of heroes is always one of them loses.... It was Jeff, this time, but really, that could go either way, every time.


There was a lot of fun had.....

Sunday, December 27, 2009

Retitled due to comment spam

UPDATE: For some reason this post has become a magnet for comment spam. I've had to reject a comment just about every week since February...

The family had a pretty good Christmas, Grandma Joan came down to stay for the holiday, the tree was thoroughly looted by all and everybody got stuff that the wanted. Or needed. The following fits in both categories:

Ideal for the hobbyist toy soldier painter, this is on wheels so it can be moved, has lots of short drawers and the top two have eighteen compartment dividers. Plus the fold outs can be used to add workspace. I found it at Fred Meyer while killing time when Jen was singing Christmas carols with the Greenwood Players. Had to have it.

Speaking of had to have it, I found this at the same time. It's a little on the small size for 25mm, but it should convert nicely to a Space:1889 light screw galley. Add a Nordenfeldt and some crew and the propeller off a balsa and rubber band plane and we have air support at last....

Sunday, October 18, 2009

New work

In the couple of weeks after Game Day and Before Tactical Solutions Gaming, I finished up the All-Aerial Hordes of the Things Army. The army list is 2 Aerial Heroes (6 AP each), 5 stands of fliers (2 AP Each) and and 2 stands of Lurkers (1 AP each). Alternately, the army can be fielded as 1 Aerial Hero (6 AP) and 1 Magician (4 AP), 5 stands of fliers (2 AP) and 2 stands of Beasts (2 AP). You could also make it just the two aerial heroes and 6 stands of fliers, since everybody but the AH's has wings... The second configuration would give a little better bad going options.

The Full Army.

The alternate Beasts or Lurkers, there are two stands of these.

The command stand with a leftover medieval oriflamme, Duc of Orleans, IIRC. I used it because it has a swan (wings, y'know) on it....

The Female Aerial Hero, or alternately a Magician. The figure is from the Anima Tactics figures, painted per the drawing supplied with the figure.

The Male Aerial Hero, again from Anima Tactics, painted per the drawing supplied with the figure, because I lack imagination.... ;o)

Monday, July 21, 2008

Update

I know I haven' t been keeping my blog up lately, but I haven't been completely useless. Here ar the completed Hill Martians. It's been hard to watch the Mariner's, high expectations have been alarmingly disappointed and so progress was much slower than it should have been.

Last weekend we went up to Mom's cabin on Lake Coeur d'Alene. My pile o' blocks looks just like it did when I left it, should be good for quite a while.


Mom had just returned from a trip to California and a visit with older brother Bruce. He sent us this gift made with his own hands:


And this is what it takes to actually qualify as a blowhard in this family.... ;o)


And, of course, every trip needs a visit to a tourist attraction, this one is in Worley, Idaho.

Sunday, April 20, 2008

Volley and Bayonet - Auerstadt

Not a very historical result....


The initial setup:


Blucher and the AvantGarde, supported by the Right Wing make a combined arms assault on Gudin's brigade to the right of Hassenhausen instead of the historical all cavalry assault on Morand's division arriving to the right of the village.


I watched this come and thought that the brigade in the open might should turn to face the assault, but thought that would leave the other flank open. I later discovered that the adjacent unit to the left in the village would make that a "protected flank" by definition and thus not subject to the unfavorable flank modifiers. Didn't do it, got clobbered and then it just kept getting worse and worse.... Gudin got hustled out of Hassenhausen by the AvantGarde and suffered Division Exhaustion in the process. The Right Wing occupied the village.

Meanwhile, the AvantGarde, hardly damaged by the poor defense of Hassenhausen scattered Friant's division approaching to reinforce. Without Bernadotte, the situation is irretrievable for Davout....

Sunday, January 20, 2008

Stones River


War Eagles once again playtested my Stones River Scenario in preparation for RadCon. I had felt that the initial games using one stand per brigade made artillery too powerful and difficult to simulate. Using two stands per brigade, I reorganized the scenario.

This made McCook way too resilient and the Confederate assault wasn't set up right either. After running the first three turns three times, I think we have something that works again. The photo is the first take, which resulted in Cheatham being decimated and McCown being unable to get around McCook's flank. Cheatham's remnants also kept Cleburne (behind him in the photo) from getting into the fight.

The first adjustment was to break up Davis and Johnson's divisions of McCook's Corps into non-contiguous brigades in hopes of making it harder for them to organize a defense, but timely command rolls by the Union and poor rolls for the Confederacy got them into good order and we stopped it and reset again.

The second adjustment was to move Cheatham all the way to Cleburne's left and put McCown a stand width ahead of Cheatham and all the way outside of McCook's right. That let's the initial turn clash be Cheatham and Cleburne fully engaged, while McCown moves on around. With the broken up deployment of Davis and Johnson, this cost McCook two full brigades in the first two turns and any decent command rolls by Hardee should keep the assault rolling. As it was, John rolled a six for McCook's initial command roll and using all six points managed to get Davis and Johnson into a refused flank with artillery support. Hardee still had the numbers, but poor command rolls meant he couldn't exploit the advantage before Rosecrans could get reinforcements into position.

The command problems posed by the rules set add some really juicy friction that drove both commanders crazy, which is exactly what they are supposed to do.

Saturday, October 27, 2007

MoBadgers, MoPics

Look, look! See, see! This is the completed Badger battle line. The two stands of warband in the back are extras. Bet you wouldn't wanna see that from the other side of the table.... ;o)


These are the new figures, if you zoom in on the photo, the personality revealed is just too much fun. I particularly like the stand of Red birds. They all look like Big Bird, but the one in the middle looks like she's looking over her shoulder in terror at the one farthest left who looks like he's about to take a bite.

Here is a rear view of the Knights, where you can't see that I painted them in trews....

Kim

Friday, August 17, 2007

Treasure Pile!


A Picture Is Worth A Thousand Words.

E-Bay score. $264 worth of minis for $100, I'm splitting with Phil.


Also making progress on the Badger Stronghold.

Wednesday, August 8, 2007

Hordes of the Things


UPDATE: Something has gone very wrong with this post. Most of the image links are broken somehow. I will fix them this evening.... UPDATE II: Fixed

Kim

Phil Williams has built a set of HOTT armies (and I have my Highland Badgers and BunRabs) and we held a tournament at Enfilade. I forgot the camera and bought a couple of disposables to get pictures, but they didn't turn out so very great.


We went to a game day at the Game Matrix in Tacoma (plug) last weekend and I took the new camera and tried to get some better photos. I got some better photos. I got some bad photos. It turns out that lighting is very important, and that bad lighting makes autofocus a little problematic. Herewith are the best of the photos.
Top, the Undead Stronghold.
Above, The Evil Stronghold with the Evil army defending....
Below, the Elvish Army and Stronghold.


A HOTT tournament wouldn't be complete without a Goblin Horde....
The BunRab Hero backed by a line of Blades....