Showing posts with label Historical miniatures. Show all posts

Monday, September 12, 2011

Miniature gaming

Chuck Hammack, newly moved to West Richland, invited War Eagles over to christen his new game room. He gave us an American Civil War scenario with Regimental Fire and Fury as the rules. It's a beautiful table, with lots of eye candy, 15mm scale figures. Photos, as always are posted at full resolution, click to embiggen if you want a closer look.


The terrain represents a gap which the Union must take and clear of Confederate troops. A few Rebels are visible as the Union brigades deploy, but after completing their deployment, the remaining four regiments of the Rebel brigade appear on the far right of the Union forces.

The left brigade, four regiments of infantry under my command advanced without consideration of the sudden appearance. Shooting commenced.


The infantry fire on the left was inconclusive, but Union artillery shattered the Rebel arty's infantry supports:


(This is exaggerated, we miscalculated at first. Only three stands of the regiment rather than five of eight were destroyed by a single, well executed round of artillery fire, but still....)

In a move worthy of Phil Sheridan, the Rebel regiments (in open order!) charged the advancing Union lines. Successfully. The entire Union brigade was thrown back in some disarray.


While the Union brigade hauled itself back into order, the Rebels, playing only for time, fell back to their original positions. Meanwhile, the Union center brigade deployed to the right to face the ambush. The Rebels advanced into the woods, then fell back before the boys in blue, never intending to get into a fight there. The Union general (John Hayes) filtered the artillery's infantry support through the woods and pursued through the open fields with the center brigade. The artillery deployed forward after decimating the Confederate regiment manning the fence.

The rebels and the bluebellies had a lively time on the ridge line in the center above, while the Union batteries suppressed and destroyed the Confederate guns. That leftmost regiment surrendered some casualties to the rebel enfilade fire before the artillery could get into action, but were still a fighting unit when the Rebs took a stand.

Continuing the pattern of Rebel aggressiveness two regiments on the right charged the Union line with cold steel. In a flurry of die roll 10's, the furious charge was broken and then smashed to oblivion. I suspect that Gary expected (not unreasonably) the leftmost brigade (shown here only by their casualties} to last at least the turn. But, alas, the dice of death had other ideas today and by this time we had the calculations down....


Meanwhile, on the other flank, after a brief Rebel defense of the hillcrest, the Union brigade under my command has finally driven the rightmost regiment into headlong retreat while in another miraculous die roll, the single regiment facing the Confederate sharpshooters (off the picture to the left) has held their gap in the ridgeline....


The Union general has eleven game turns to clear the gap before dark. At the end of turn eight, the table looks like this:


(You may want to click on the photo to enlarge it to full size.) On the Union right, the gallant confederates are outnumbered and overlapped. In the center, the rebel artillery has been destroyed, a last section limping away. The regiment assigned to support it is hiding behind the terrain, spent in the first turn by massed artillery fire. On the left, one regiment is in headlong retreat, the other must either retreat or face Union troops from front and rear. The scattered Confederates can't consolidate and hold out and will inevitably be swept from the field. So I say. Y'all may think differently.... ;o)

Sunday, March 20, 2011

Trafalgar, only more!

So, the latest War Eagles project was a continuation of our New Year's Day battle (chronicled here).

This year's scenario was a hypothetical wherein all available Spanish and French ships in the Mediterranean Sea attempt to break past a scraped up British blocking fleet in the Straits of Gibralter. The British have a large number of frigates and smaller ships, a few third rates and a couple of East India Men which the Spanish mistook for third rates and pounded to pieces....
The break out was to reinforce the Combined Spanish/French Fleet at Trafalgar. In order to create an even tougher problem for the British, Gary researched all available French and Spanish ships and inserted a Northern Reinforcement Division of seven SOL and a Frigate and the French Ghost Fleet, a well commanded, experienced, small but powerful fleet loose in the Atlantic at the time on a commerce raiding mission.

The map below was modified from a map available at Broadside, Home of Nelson's Navy...
a collection of pages describing life in Royal Navy in the late eighteenth and early nineteenth century
The original map and a description of the historical battle is here.

The scenario was designed using a similar map from "Nelson, The Commander" by Geoffrey Bennett, 1972. I believe some liberty's were taken with the order of ships in the original van, which became the rear division when the Combined Fleet reversed direction prior to the battle. I have made some adjustments to the map to allow for the actual location of our ships in our What If scenario, which begins a little later in time than the original map, as the Combined Fleet has had a bit more time to gather itself into a line of battle. By the time the British fleet approached the Combined Fleet, cohesive battle lines had been formed in both the lead and lagging divisions. The Northern Reinforcement, the Mediterranean Breakout and the Ghost Fleet all entered the table in line of battle. A number of frigates were present on both sides. They are shown on the original map, but in our re-fight, the frigates all withdrew before the battle, off table to the East and West respectively, so I removed them from the map below showing our starting positions. More or less. Unfortunately, I forgot my cameras the first day, so there are no photos. In the absence of photography, I spent a lot of time with Paint working on this map.

You can see the Africa, British 64, at the head of the Combined Fleet. Captained by Henry Digby, Africa had become separated from Nelson's column during the night. Liberally interpreting his orders to rejoin Nelson, Digby sailed down the line of battle toward Nelson's Victory at the head of the windward British column, exchanging broadsides with a number of French and Spanish ships. In our refight, he didn't quite make it to Nelson, striking his flag due to hull damage about two turns short....

As the British columns approached the Combined Fleet, all ships within range fired at the rigging of the ships at the head of the columns, Nelson's Victory and Collingwood's Royal Sovereign. Both ships were dismasted about 6 inches short of the line, disrupting the British lines of battle and ultimately preventing them from their goal of penetrating and enveloping the rear division of the Combined Fleet. The first night's action took up the first twelve turns. On our second evening's session, here is how things stood:

In the historical battle, Nelson struck the center of the Combined Fleet's line, penetrated it and initiated a general melee against the rear of the column, with a substantial advantage in numbers and quality. In the meantime, the lead division sailed on for a time and was too late in returning to the rear division which was overwhelmed. With the advantage of hindsight and reinforcements, the Combined Fleet tried a different approach. After Victory had been dismasted, the gigantic Santissima Trinidad, 130 followed by the San Justo, 74 turned to engage, paralleled by Admiral Villeneuve in the Bucentaurre, 80 followed by the Neptune, 74. With the Africa struck and a hazard to navigation immediately to windward of the Santissima, turning into the British line of battle created an unholy traffic jam. The Bucentaurre, hammered by Victory (mastless but still a gun platform) and other British ships, was forced to strike on turn 14. Neptune pulled out to pass to windward. The Santissima Trinidad, engaged by three British ships is being pounded and cannot last long. San Justo and other ships from the van are engaging the British ships pulling past the Santissima. Meanwhile, Victory has been attracting attention even though dismasted. On turn 15, after taking damage every turn, Victory finally is holed at the waterline by (FR) Redoubtable's final broadside before being forced to strike herself. Tonnant, British 84, adjacent to the east of Redoubtable, hammered by the full Northern Reinforcement line a few inches further east and pounded by Redoubtable's partner immediately ahead also struck but only after forcing Redoubtable out of the fight.

The Combined Fleet van turning immediately back into the fight plus the arrival of the Northern Reinforcement's battle line has created a substantial numerical advantage for the Spanish and French ships engaged with Nelson's column. Nelson's column is no longer a column and maneuvering is hampered by the many ships which have struck or sunk in the center and the sheer glut of ships in a small space. The Victory has struck and Nelson is transferring his flag to the Neptune, 98. It's a hard pounding for everybody and more Spanish and French ships are nearing the fight as the Mediterranean breakout and the Ghost fleet sailing upwind are nearing the leeward column.

The general situation at the end of the session:


One more session was needed to reach a conclusion. But the last session would start with a huge surprise on turn 17. A picture is worth a thousand words.
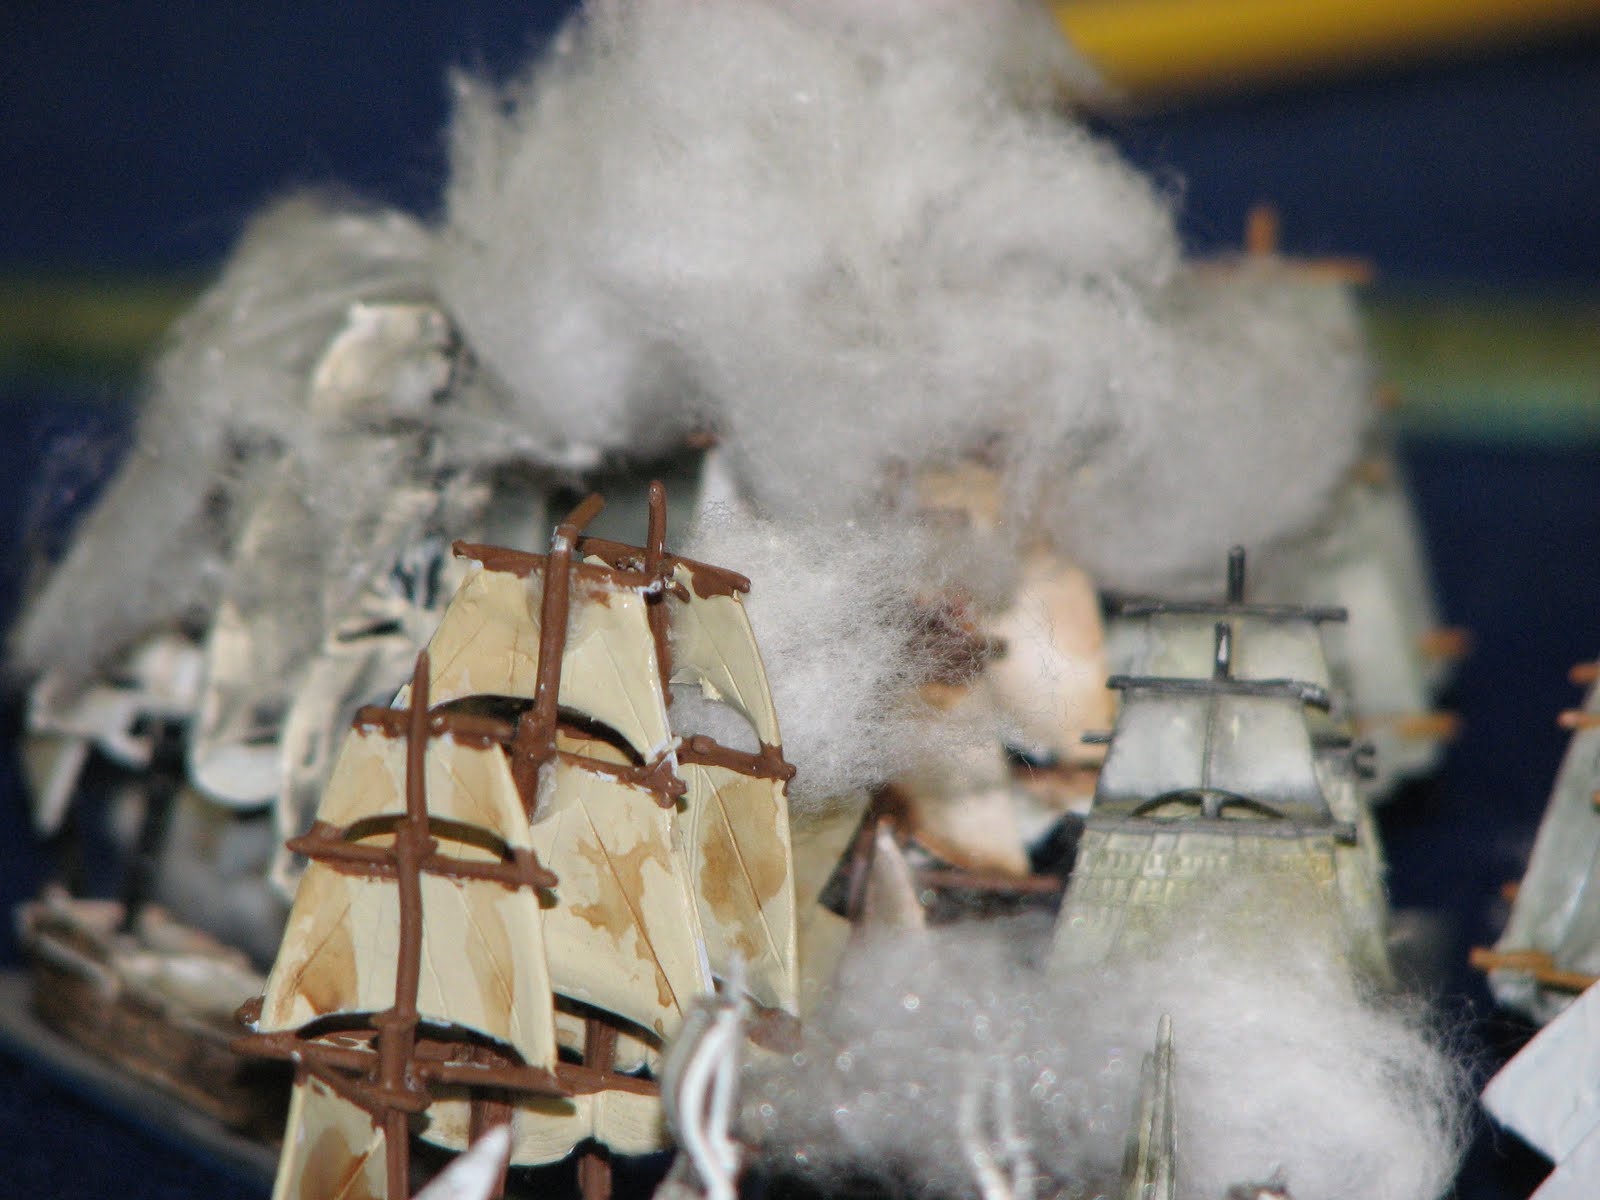
Obscured by the huge cloud of smoke, throwing flaming debris and splinters everywhere, the largest ship in the world, flagship of the Spanish Fleet, the Santissima Trinidad just blew up. Good photo op. This doesn't really change the battle, she would have been forced to strike in the next turn and probably would have done very little more damage, but wow, was it unexpected. Bucentaurre (already struck), San Justo, Neptuno and Mont Blanc all took friendly damage from the explosion, but Ajax, Orion and Conqueror adjacent to the explosion, lost masts, took hull hits and lost guns.

On turn 18, Royal Soveriegn finally succumbed to the fire of the line of battle sailing past her and Collingwood transferred his flag to Belleisle. In another surprise, at the tag end of the Van's line, Intrepide, French 74 and Spartiate, British 74 coughed final defiance at each other and both surrendered. Unfortunately, neither were able to successfully fight the fires started and burned to the waterline. Behind the Spartiate, you can see where the Minotaur, hulled numerous times while sailing the length of the Combined Fleet van, has quietly sunk beneath the waves.

The Africa, Minotaur, Spartiate, Mars and Collosus (?) all managed to prove a basic principle: Sailing down a column of ships that outnumber you will spread the damage you give out over multiple ships and they will survive, while you take all the damage from the enemy ships and don't.

On turn 19, the Mediterranean breakout fleet reached engagement range, with the lead three ships all firing on what I think was Thunderer, forcing it to strike in just two turns. On turn 20, with Thunderer struck, Ajax and Conqueror unable to sail into the wind due to masts lost in the explosion of the Santissima Trinidad, the hoped for superiority of the leeward column compromised by the loss of Thunderer, Mars and Colossus, the imminent arrival of the Ghost Fleet and the head and tail of the Combined Fleet's rear division turning on it, the minor success of forcing the Argonaute to strike just didn't seem to be enough to balance the bad news. Nelson signaled for a general withdrawal.
The Lee squadron ships engaging the Mediterranean fleet at the rear of the Combined Fleet can easily sail away to the west. Belleisle and Neptune along with the two ships engaging the Northern Reinforcement, plus Orion (able to sail only down wind, but already headed that way) and Conqueror backing out of the mess can withdraw to the west. Ajax is trapped in the mess and forced to surrender.

The battle has been fought in light winds, but gale winds are expected tonight. The fleets are just a few miles off a lee shore, and ships with compromised handling are liable to be driven onto the rocks and destroyed. A common result of critical hits has been to sever the anchor cables so for many ships, anchoring in shallow water before running aground is not an option.

The final tally:

Spanish losses: The Atlas (74), San Juan de Nepomuceno (74) and San Augustino (74) all forced to strike due to hull damage and without anchors were driven onto the shore by the gale and destroyed. The Neptuno, hulled below the waterline, sank outright. And, of course, the Santissima Trinidad. All other Spanish ships were either salvaged or made port on their own.

French losses: The Intrepide (74) burned to the waterline. The Redoubtable (74) sank during the battle. The Argonaute, sailing ability compromised and anchor cable severed, was driven onto rocks and broken to splinters.

British losses: The Minotaur (74), the Colossus (74), Ajax (74) and Britannia (100) were salvaged and brought to port as prizes by the Combined Fleet. Proper allocation of the prize money remains in dispute, will remain in dispute and owing to the two countries involved, will probably have a recrimination phase lasting for centuries if the legal disputes are ever settled.... Prize crews aboard the Tonnant (80), Mars (74) and Atlas (74) were unable to keep to windward of the Cape of Trafalgar and were taken off. Peasants living near the Cape have building materials for the next 10 years. Leviathan (74), Africa (64), Thunderer (74), Royal Sovereign (110) and the Victory (100) all sank before the gale winds could wreck them.

Nelson lives, but the luster of his name has been blemished, dulled, tarred, perhaps even eclipsed. Time will tell if he can redeem himself or if the Admiralty will even ever employ him again.

UPDATE: You may have noticed in the photos above, some of (especially) the British ships are named in more than one place. I am not at all confident of where specific ships went in our scenario, and especially in the Lee Division commanded by Collingwood. Mars, Colossus and Thunderer are all over the place. If anybody can correctly identify any ships, please let me know and I will redo the photos as needed.

ALSO: I completely neglected to document the singular success of the British Reinforcing Squadron...er, ship. The ship which was observing the port from which a large portion of the Spanish Northern Reinforcement issued was released to Nelson as a reinforcement. Operating alone, **** harassed the tail of the returning Combined Fleet van, forcing two ships to strike, even while backtracking to rescue a politically important midshipman who had fallen overboard.

Sunday, January 2, 2011

2011 Annual War Eagles Wooden Ships and Iron Men

War Eagles has an annual Wooden Ships and Iron Men large miniatures scenario, hosted by Gary Swearingen on New Year's Day for many years now. Previous events are chronicled here and here.


As always, photos are posted at full resolution, click to embiggen....

This year's scenario was a hypothetical wherein all available Spanish and French ships in the Mediterranean Sea attempt to break past a scraped up British blocking fleet in the Straits of Gibralter. The British have a large number of frigates and smaller ships, a few third rates and a couple of East India Men which the Spanish mistook for third rates and pounded to pieces....

The Allied forces consisted of 19 Ships of the Line including two Spanish 110's, two newly built French 74's and a variety of older third rates with 9 frigates. More or less.

Present as Commanders were Mike Farley in overall command for the British, ably assisted by Karl Soderholz and John Hayes. The Spanish were commanded by Brian Swearingen, assisted by Steve Luksic. The French Admiral was Kim Harris (that would be me), with with two new French 74's and two old frigates, a Kingdom of Two Sicilies battle line of two 74's and four frigates, and a Spanish Battle line of two old 74's and two even older 60's. Order's to the Sicilian battle line were frequently altered by the merciless moderator, Gary Swearingen.

The Allied fleet was greatly aided by a following wind that never changed throughout the game. Wind change is diced for every third turn and changes in direction and/or intensity on a 1 on a die 6 roll. The game was completed in 19 turns and 9 hours.


The Spanish fleet on the right was generally able to brush past the few frigates on the left after taking some long range rakes and some closer fire that did negligible damage. They succeeded in smashing one East Indiaman mistaken for a third rate SOL and smashed another frigate trying to retire to the upper right corner.... We'll point out these sights of interest in later photos.

There was a lot more heated action on the left as the French feinted right, back to the left and then gave up and sailed into the middle of the British block. The wiggle:


Close Action:


The lead French 74 had taken a pounding moving forward and took it into his head to get a better ship so rammed one of the British frigates and formed boarding parties. Unfortunately, every British ship in the vicinity unloaded on her and while the boarding parties survived the hail of round shot, the last of 7 hull points at the beginning of the turn was marked off in fire, just before melee. They didn't explode, but were forced to strike with 20+ blocks of boarding crew all ready to go onto the 6 crew block frigate.... Oh well, would've been a bit crowded getting away, anyway. ;o) The Merciless Moderator has made boarding actions much more difficult, requiring a full turn to organize the boarding party (and the party takes double casualties while organizing) and then requiring multiple, very deadly, melee rounds in each turn. Boarding is seldom a good idea.


Meanwhile, the Sicilian Admiral is taking a pounding.

At this point, it's pretty much a settled affair. The French 74 is lost, a stern rake from the French Admiral on the white sailed frigate forced it to strike as the Admiral moves freely around the British right accompanied by a cloud of frigates. The Sicilian's, under the Merciless Moderator's command break to their left, the British right and, making for the African coast then back into the Mediterranean. The British admiral committed one SOL to a pursuit of the badly battered Sicilian Admiral's SOL and a second SOL and four frigates. I wouldn't say it was foolhardy, they are British, but still....

Meanwhile, back in the Spanish fleet


The main Spanish fleet has cleared the British line and has clear sailing. The rejoining Spanish column will have some trouble with the two British SOLs. The third ship in the line gets trapped by the two British SOL's and takes a considerable pounding.


But the Spanish fleet exits mostly unscathed, trailed by the Spaniard who is quite soggy. The MM has ruled that it will get overhauled and taken due to its considerable hull damage, exiting the table with just one remaining hull point.


Following the Spanish, the French Admiral and his two frigates make a break for the exit.


There is always a last hurrah! Two British frigates take a stern rake on the French Admiral as he exits the table last....


This action will carry forward into a Trafalgar hypothetical, reinforced by those ships which have survived the breakout. The British have two prizes, SOL which will require SOL to haul them to port. The merchantmen are too large for the frigates to tow to port, but the British commander has indicated willingness to abandon them. There were at least two and possibly more frigates that will also have to be towed to harbor. Tow ships may be too delayed to intervene at Trafalger, at least I am hoping so, otherwise, this may turn out to be an Allied debacle. The Allies succeeded in breaking eleven ships of the line into the Atlantic, including the two Spanish 110's and a new French 74 which will are powerful fighting vessels. The British will have a shiny new French 74 to rebuild and an ancient Spanish 60 that may not be worth the bother. If the tow ships are delayed, the British will have only one SOL to add to Nelson's battle line compared to the Allies eleven. If the tow ships are not delayed (the action takes place in the Straits of Gibralter, so it will be a short tow), there could be as many as five additional British ships of the line to reinforce Nelson. Historically, there were 27 British SOL to the Allies 33 at Trafalgar. This event would make it either 44 to 28 or possibly 44 to 32. Should be interesting to find out....

Friday, February 19, 2010

RadCon 5B

By all accounts it was a huge success....

Some pictures:

Attendance was down about 5 percent, but you wouldn't know it from the game room....


The Space:1889 Screw Galley HMS Timbonin was a good draw, especially for Hill Martians....


We played Wings of War off and on all weekend.

Sunday, December 27, 2009

Retitled due to comment spam

UPDATE: For some reason this post has become a magnet for comment spam. I've had to reject a comment just about every week since February...

The family had a pretty good Christmas, Grandma Joan came down to stay for the holiday, the tree was thoroughly looted by all and everybody got stuff that the wanted. Or needed. The following fits in both categories:

Ideal for the hobbyist toy soldier painter, this is on wheels so it can be moved, has lots of short drawers and the top two have eighteen compartment dividers. Plus the fold outs can be used to add workspace. I found it at Fred Meyer while killing time when Jen was singing Christmas carols with the Greenwood Players. Had to have it.

Speaking of had to have it, I found this at the same time. It's a little on the small size for 25mm, but it should convert nicely to a Space:1889 light screw galley. Add a Nordenfeldt and some crew and the propeller off a balsa and rubber band plane and we have air support at last....

Sunday, October 11, 2009

Tactical Solutions Gaming 2009

I've been painting and basing some miscellaneous new stuff, of which I have not yet taken photos to share over the last few weeks, getting ready for Tactical Solutions Gaming 2009 which happened October 9, 10 and 11 in Spokane. I loaded up some new music on my MP3 player for the trip and when I set off, the MP3 player randomly queued up Beethoven's Ode to Joy.... Auspicious, no?

I had a boatload of fun playing and presenting games and spent a lot of time photo documenting the event. Herewith, some favorite photos:

Mark Rounds awaits the first gamer of the day....

An example of Mike Clinton's new Caproni 3 engine bombers for Watch Your 6.

The gaggle of Caproni's thunder overhead under assault by German fighters.

Tank columns from the big multiplayer Flames of War on Sunday.

A failed assault from the Flames of War Tournament. First the tanks got popped, then the follow up infantry assault got equally massacred.... I suppose you had to be there to see it unfold. Gruesomely.

Zulu Hordes vs. Victorian British in Hordes of the Things. This is the second wave of Zulus. After killing at least the every stand in the Zulu army at least once and watching the new hordes forming up to come across the table yet a third time, the British commander withdrew in disgust.

I don't think I had any fun this weekend. I don't think.... ;o)

Tuesday, March 31, 2009

GameQuest 2009

GameQuest 2009. An interesting venue, the Vancouver WA, USA Hilton convention center had a boatload of space and about 900 attendees. It's mostly board games and board games that include miniatures. My buddies and I got in a couple of games with the Anniversary Edition of Axis and Allies, but I put on a Wings of War scrum from 1:00 to 5:00 PM on Saturday and got 9 players including a husband and wife that brought their own planes.... There seems to have been a bit of grudge involved, but husband (flying Goring's white plane) drew the explosion card for his first damage card, then drew it again after a couple exchanges with a fresh plane. Not a good night to be the husband, I think. The tweener flew the last plane shot out of the sky, but a couple of the older guys flew off the field intact.


The wife gets caught by herself in a Series III Nieuport but husband's Goring get's blowed up and she wiggles for while but eventually succumbed to the firepower from the combined Richthofen's (Series I Albatross DIII and Series II Roland CII).

Father and son flew till shot down then went to play some other game, leaving seven players still in. Husband gave up on Goring and came back for a third try in one of my planes.... We started with two Goring's at either end of the table.

The rivers and roads are from WizardCraft out of Coeur d'Alene, ID US sold ready to play. The craters are from Stonehouse Miniatures out of Portland, resin castings that I painted and decorated. They are all basically intended for 15mm minis, but it makes a more interesting table than featureless felt.... ;o)

Sunday, March 22, 2009

Trapped.....

So, the big pre-WWI naval campaign had it's first battle last night. All of South America plus some European Allies taking on the US over the barely averted crisis in Mexico at Vera Cruz in 1914. The Allied fleets were called to rendezvous at Caracas, Venezuela, so the Spanish and Germans (under my command) went there. The Germans went to tweak American noses and as the Spanish/Portuguese fleet went to relocate, American contacts were reported to the north. My threat estimate was a maximum of seven American dreadnaughts (to my three) so we sallied with light recon elements to locate the Americans and break east to the allied Brazilian and Argentinean fleets.

The Portugese made first contact, engaging an American cruiser line but finding a line of battleships behind it. Then another line of battleships appear to the west, spotted by the Spanish cruisers...... Eleven battleships, not seven, plus several large armored cruisers....


We make smoke and turn east. The Western American battleline sinks my cruisers one by one as the run for the destroyer screen, the Eastern American Battle line doubles back to break through the smoke screen and engage my dreadnaughts just clearing the harbor....


But when the Americans stick their nose through the smoke screen it gets bit off. First a torpedo run by the modern destroyers forces the Americans to break their line and a lucky torpedo hit damages Louisiana. As Kentucky clears the smoke, the Spanish dreadnaughts and the Caracas fort smash and sink it. The destroyers dashing between the American battleships are obliterated by heavy gunfire.

Louisiana and Missouri break West and the antique Spanish destroyers with their short range torpedoes break through their smoke screen for a perfect run on them. Both ships soak up multiple torpedoes and two of the Spanish destroyers escape unscathed....

Kentucky is sinking and Louisiana and Missouri were last seen limping northwest. Without the modern destroyers, the smoke screen to the north disappated and the heavies engaged. Wisconsin was battered out of the line, Maine was hammered by a combined salvo and the Spaniards appeared unfased to the Americans. After that unpleasantness, the Yankee battlelines combined and ducked behind their own smokescreens, but the only photos I have are out of focus. We left the table their on acount of 2:00 AM, so I'll take the tripod next time and get starting photos when action recommences.

Friday, January 2, 2009

Annual Wooden Ships and Iron Men

War Eagles has an annual Wooden Ships and Iron Men bash on New Year's Day. Last years report is here.

This year's battle is based on the historical events that inspired some of the Horatio Hornblower novels, the Battle of Algeciras. In the first phase, the British lost a ship of the line, the first in nearly a century and so a real scandal, at Algeciras Bay. The French attempted to move the prize, with a reinforced French battle line plus a Spanish fleet to Cadiz. The British launched everything that could be readied from Gibraltar (just across the straights from Algeciras) including the ships that had been knocked about in the first phase. The British intercept at dawn outside Cadiz. (click on the photo for enlarged view)


The French admiral is tasked to make port safely, with the British prize, Hannibal. The Spanish commander is tasked to make port safely. The British admiral must retake the Hannibal to salvage his honor and received orders to prevent a junction of the French and Spanish fleets at all costs.

The intercept by the Superb missed it's goal and trailed the prize until ultimately achieving the recapture. The main French fleet sailed easily into Cadiz, since the British admiral ignored them, focusing on retaking the Hannibal.


The British frigate next to the red die managed a rake on the French tow ship, slowing it for the Superb to overtake and guaranteeing that the British admiral can head reach the tow ship and the prize. A follow on by a brig left the tow ship with a mast over the port side masking it's guns and no longer able to sail into the wind at all.

But a timely change in the wind changes things.


At the bottom we see the fate of a Spanish frigate that came out of Cadiz harbor expecting gunboats to follow, but only one did. Sailing straight into the three British ships of the line, it is a dismasted and a burning hulk that ultimately exploded between the second and third ships doing some small sail and hull damage, temporarily impairing the battle line as fires were put out all over the two ships. Above is the British brig that knocked down a mast on the French SOL towing the Hannibal and bringing it to a stop. Unfortunately, the wind change left it trapped by a French frigate and schooner and overwhelmed.

By the time the battle line closed to firing range, the fires were out and the line dished out a pounding that blew up the French tow ship in a single round. Some additional damage was done to Superb which was closing to board and the Hannibal which remained in proximity.


For reasons sufficient to the British Admiral in temporary command, (I had to leave for a RadCon committee meeting) the Spanish were allowed a negotiated free pass into Cadiz and no further action took place. IMO, the main British line should rake the leading Spanish ship, sail down the starboad side of the Spanish line, penetrating it at some point and scattering the Spaniards. The two additional British SOL's approaching should then have opportunities for additional actions and at the least, the Spanish fleet would get knocked about by the superior British gunnery and most likely a prize or two could be taken. The relatively weak Spanish gunnery would likely do some damage, but it seems unlikely to me that they would score any substantial success. I invite comment. (click on the comments button and type your thoughts)